Last reviewed against the official Android and Google Play documentation: October 2026.
Most Android apps are written on one phone. That phone has a known Android version, a comfortable screen, plenty of memory, and a developer who knows exactly where every button is. Then the app reaches real users, and the same build starts behaving differently on hardware that was never in the room.
The symptoms are rarely dramatic. A primary button that sits correctly on a 6.7-inch screen slides under the status bar on a compact one. A layout that looked deliberate in portrait spreads awkwardly when a tablet is turned sideways. A screen that opens in half a second on a flagship takes several seconds on a device with 2 GB of RAM. A permission dialog behaves differently on a manufacturer build that adds its own privacy layer. A save action that works on office Wi-Fi fails when the connection drops mid-request. None of these mean your app is badly built — they mean the app has not yet met the range of conditions it will actually run in.
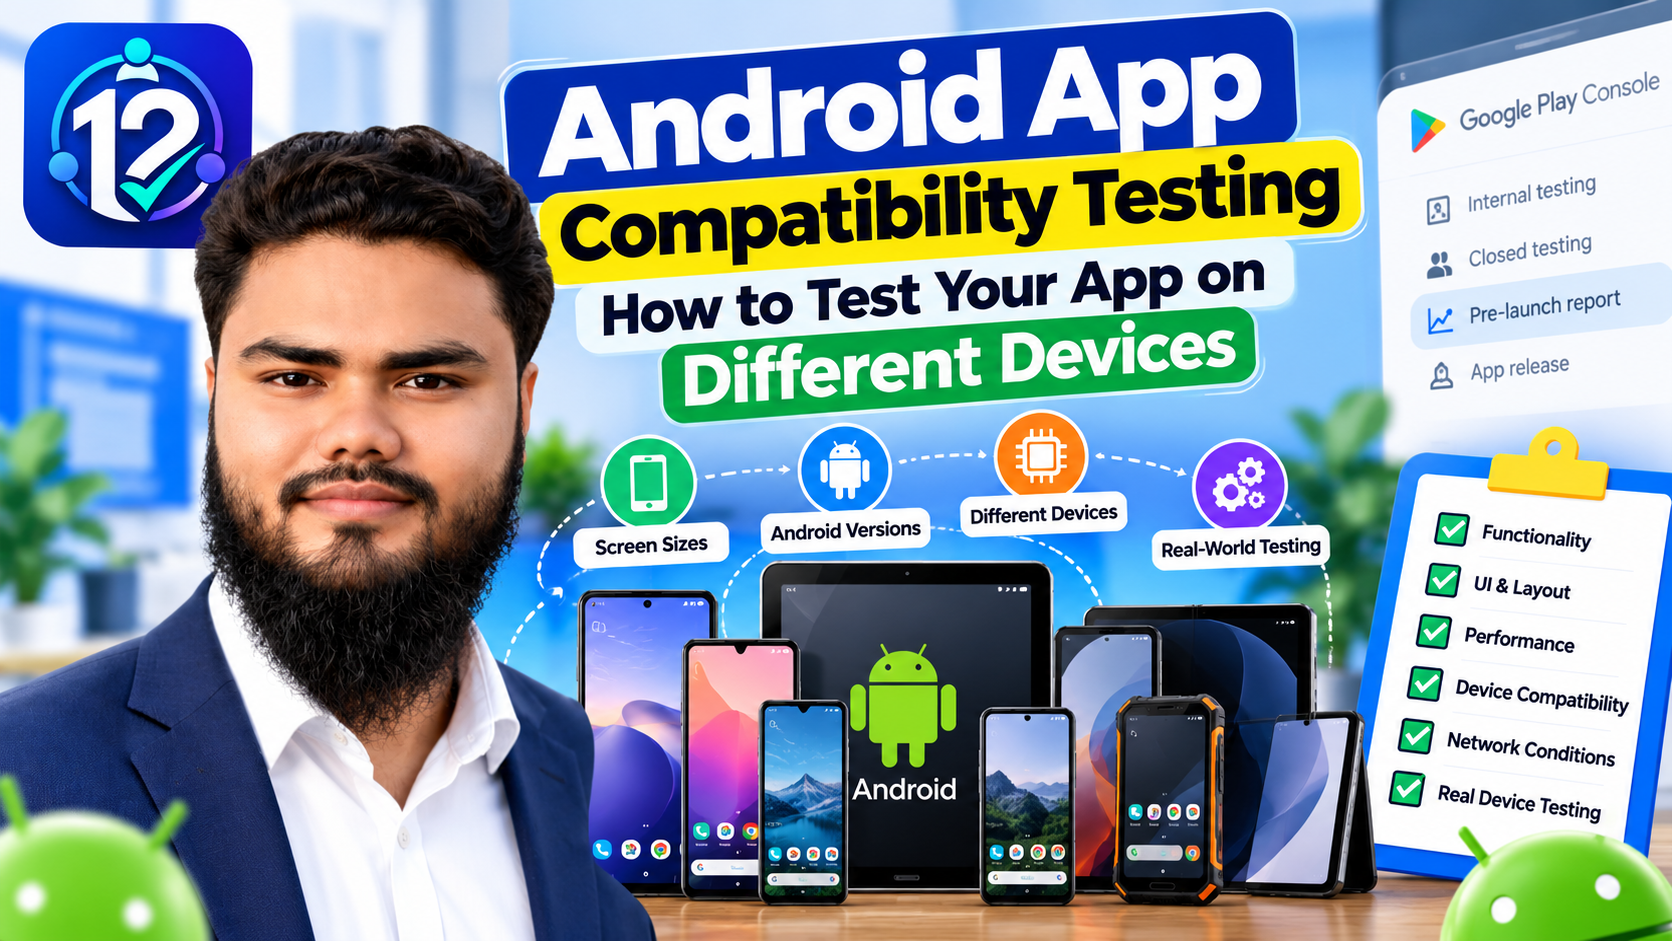
This guide is about finding those problems before your users do. It covers what Android compatibility testing means, which device differences are worth testing, when to use emulators, real devices, automated tests and Google's own tooling, and how to record and prioritise what you find.
Quick answer
Compatibility testing means checking that your app installs, launches and behaves correctly across the range of devices, Android versions and conditions you actually support — not just the one you develop on.
- Pick a small, deliberate set of configurations that matches your audience instead of chasing every Android device on the market.
- Let automated tests cover layout regressions, rotation and state restoration, because those checks are repetitive and easy to forget by hand.
- Let Google Play's pre-launch report run its automated crawl across a set of test devices and report stability, performance and accessibility findings.
- Use Firebase Test Lab or a similar device farm when you need specific real devices or configurations you cannot buy or borrow.
- Keep hands-on testing on real hardware for the journeys a crawler cannot judge: does this feel right, is this copy clear, does this flow survive a bad connection.
No single method on that list replaces the others. The rest of this page is about combining them in the right order, on the right devices, without testing for the sake of testing.
What compatibility testing actually means
Compatibility testing asks a different question from functional testing. Functional testing asks "does this feature work?" Compatibility testing asks "does it still work here?" — on this Android version, this screen size, this manufacturer's build, this language, this network, with this hardware present or absent.
Android's own testing documentation draws the same line. The UI testing guide notes that an app can target thousands of devices across many API levels and form factors, and that the OS's high level of customisation means your app could render incorrectly or even crash on some devices. It calls running UI tests across varying contexts compatibility testing, listing API level, locale and orientation as the axes that matter.
In practice, several kinds of testing overlap inside that definition:
- Functional testing — the feature does what the specification says, on a known-good setup.
- Device compatibility testing — the same feature survives different Android versions, chipsets, manufacturer builds and hardware capabilities.
- UI and layout testing — screens render without clipping, overlap or unreadable text at different window sizes, densities and aspect ratios.
- Performance testing — startup time, frame rate, memory use and CPU load stay acceptable on modest hardware, not only on your development phone.
- Regression testing — a fix or a new feature has not broken something that used to work on a device you are not looking at.
- Security and accessibility checks — content is labelled for screen readers, touch targets are large enough, contrast is sufficient, and data handling does not depend on a device state you assumed.
These are not separate projects. One manual pass on a small phone with the screen reader on can surface a layout bug, an accessibility issue and a state-restoration crash at the same time. The value of naming them is that you can be deliberate about which ones your automated tests cover and which ones a human has to look at.
Why one device is never enough
Android deliberately gives device manufacturers and users a great deal of freedom. That freedom is the source of almost every compatibility surprise.
- Android version and API level. Behaviour changes between releases — background execution limits, permission handling, notification rules, and interfaces that are restricted even though they still compile. A feature that depends on an API introduced recently will not exist on an older device; a feature that uses a restricted interface may break on a newer one.
- Screen and window size. Physical inches matter less than the window your app is given. Android's window size classes group available width into compact (under 600dp), medium (600–839dp), expanded (840–1199dp), large (1200–1599dp) and extra-large (1600dp and above), with separate bands for height. The documentation is explicit that these classes describe the window, not the device: split-screen, desktop-style windows and folded or unfolded displays can change the window while your app is running.
- Manufacturer builds. Battery management, notification handling and added privacy prompts vary between manufacturers. An app that survives the reference Android build can still be killed in the background on a device with aggressive power management.
- Memory, storage, CPU and battery. A screen that is merely slightly slow on a flagship can become unusable — or trigger an ANR (application not responding) error — on a low-memory device.
- Orientation and posture. Rotation, folding and resizing recreate the activity by default, so code that assumes an activity outlives a configuration change can crash. Android's screen and window size testing guide treats state restoration as one of the two things to verify alongside visual layout.
- Permissions and system settings. Denied, revoked, one-time and "ask every time" permission states, plus system-level controls such as restricted background data, change what your app is allowed to do.
- Language and locale. Longer translations break fixed-width buttons, and right-to-left locales can mirror layouts in ways that expose hard-coded margins.
- Network conditions. Slow, metered, captive-portal and intermittently dead connections are normal user conditions, not edge cases.
- Hardware features. Camera, GPS, Bluetooth, NFC, fingerprint sensors and device postures. A declared requirement that a device does not meet can make your app unavailable to it entirely — which the pre-launch report surfaces as an incompatibility rather than a bug.
The practical conclusion is not "test everything". It is: choose the configurations that matter most to your app and your users, and be able to explain why each one is on the list. There is no official minimum number of devices, because the right matrix depends on what your app declares it needs, who installs it, and how much a failure would cost you.
Figure 1 — The axes that change app behaviour across Android devices. Pick the ones your app depends on.
Types of testing methods
Five methods cover nearly all compatibility work, and they fail in different ways. The table below is a starting point for deciding which one a given risk belongs to.
| Method | Best used for | Main advantages | Limitations |
|---|---|---|---|
| Manual testing on real devices | Core user journeys, first-run experience, anything needing judgement | Catches feel, clarity, real sensors and real network behaviour; no test code needed | Slow, hard to repeat exactly, limited by the devices you hold |
| Android Studio emulators | Fast iteration, many API levels and screen sizes, layout checks | Free, scriptable, configurable, easy to reset and re-run | Not real hardware: chipsets, cameras, Bluetooth, manufacturer builds and true performance all differ |
| Automated UI and functional tests | Repetitive checks, layout regressions, rotation and state restoration | Repeatable and fast; can run in CI on every change; screenshot tests cover many elements at once | Only asserts what you thought to write; needs maintenance; cannot judge quality of experience |
| Google Play pre-launch report | An automated sanity sweep across a set of test devices when you upload | Automatic, no extra cost, device-specific detail, screenshots and accessibility findings | Runs only where device-lab capacity allows; a crawler cannot reach behind a login unless you supply credentials or a script; Google states it cannot guarantee every issue is found |
| Firebase Test Lab | Running your tests on specific real devices and configurations you do not own | Real devices in a Google data centre; results with videos and logs; integrates with Android Studio, the gcloud CLI and CI | Quota-limited and paid beyond the free tier; you must bring a test or accept a Robo crawl; devices are reset after each run |
The mistake worth avoiding is treating any row as a substitute for the row above it. An emulator sweep does not prove a phone in a pocket works. A green automated run does not prove a human can complete onboarding. A pre-launch report is a strong safety net, not a sign-off.
Building your device matrix
A device matrix is the list of configurations you have committed to testing, written down so it survives the next release. The example below is a template to adapt — it is not a Google requirement, and no official body publishes a mandatory device list.
| Test dimension | Example configurations | What to verify | Priority |
|---|---|---|---|
| Android version | Your declared minimum, the most common version among your users, and the current release | Install and launch, permission flows, background behaviour, restricted-interface warnings | High |
| Window size | Compact phone, large phone, tablet, foldable or resizable window | No clipping, overlap or unreadable text; navigation reachable; layout adapts without stretching components | High |
| Orientation and posture | Portrait to landscape mid-task; folding and unfolding; entering split-screen | No crash on configuration change; scroll position, form input, navigation and in-progress state survive | High |
| Manufacturer | At least one heavily customised build alongside a reference or stock-like device | Notifications, background work, battery restrictions, system permission prompts | Medium |
| Device capability | A low-memory, modest-CPU device alongside a current mid-range or flagship | Startup time, scrolling smoothness, memory pressure, ANRs, battery-heavy features | Medium |
| Locale | Your default language, one with long strings, and one right-to-left language if you ship it | Truncation, wrapping, mirrored layouts, date, number and currency formats | Medium |
| Network | Slow connection, connection lost mid-request, switching Wi-Fi to mobile data | Clear error states, safe retries, no duplicate submissions, no data loss | Medium |
| Hardware features | A device that has each feature your app relies on, and one that does not | Graceful degradation when a feature is missing; no crash from an absent camera or sensor; correct store availability | If used |
Two rows carry the most weight in most apps: the oldest Android version you support, and the smallest window you support. Those are where "it worked on my phone" most often stops being true.
Google Play Console pre-launch reports
Before compatibility testing became a manual checklist, Google built a device lab into Play Console. A pre-launch report is generated automatically when you upload an app bundle or APK — subject to capacity in that device lab — and again when a release is saved to the production track. Google's documentation describes the process plainly: your app is installed on a set of Android devices in the test lab, then automatically launched and crawled for several minutes with actions such as typing, tapping and swiping.
The report covers stability, Android compatibility, performance and accessibility. You will find it in Play Console under Test and release > Testing > Pre-launch report, with its settings page under the same section. Two notes from the documentation are worth repeating: test devices cannot test apps without a main launch activity — launchers, widgets, keyboards and watch faces are excluded — and apps that require country or install validation may need small code changes before the crawler can run at all.
What you get back is a summary of errors, warnings and minor issues, grouped by category, plus a launch recommendation. Google's interpretation guide gives representative examples:
- Errors — crashes, ANRs, defective libraries, and use of restricted unsupported interfaces.
- Warnings — slow startup and load times, sign-in or crawl problems, memory issues, and use of unsupported interfaces that are not restricted yet.
- Minor issues — missing content labels, colour-contrast problems, small touch targets, implementation issues.
The Stability tab is where the compatibility signal is richest. Each issue lists how many devices it appeared on, the relevant API where applicable, and how often it occurred, and you can expand it to see the device name, screen size, Android version, RAM, ABI and locale, plus screenshots, video and downloadable stack traces. If your app uses interfaces that are not part of the public Android SDK, OS compatibility errors and warnings appear on the Overview and Stability tabs, categorised as restricted, unsupported with restriction imminent, or unsupported with restriction not imminent — Google's own suggested order of priority.
The Performance tab reports per-device measurements including average CPU use, average memory use, and average network bytes sent and received; average frames per second is available for tests that use game loops. Google notes that devices running some older Android versions may not be able to produce performance data.
Two further tabs tend to be underused. Accessibility splits findings into content labelling, touch-target size, implementation and low contrast. Screenshots shows how your app appears across test devices in different languages, along with device resolution and DPI metadata — and it distinguishes devices that were unavailable during testing from devices that are genuinely incompatible with your app bundle. That second list is a compatibility finding in itself: it tells you which devices your declared requirements exclude.
Read the caveat as a warning, not a formality. Google's own guidance states that although the pre-launch report is a practical and powerful tool, Google cannot guarantee that tests will identify all issues. A clean report means the crawler found nothing on those devices under those conditions. It is not evidence that your app is free of compatibility bugs — treat it as one input, not a finish line.
Firebase Test Lab vs a phone in your hand
Firebase Test Lab is Google's cloud device testing infrastructure, and it exists precisely to solve the "I cannot buy forty phones" problem. You define a test matrix — the documentation summarises the model as devices × test executions — and Test Lab runs your tests on devices installed and running in a Google data centre. Each device in a matrix is identified by its model, OS version, screen orientation and locale, so the same app can be exercised in configurations you could never assemble locally.
Three test types are available: instrumentation tests written with frameworks such as Espresso or UI Automator, Robo tests that explore your app's UI without any test code, and game loop tests that drive a demo mode in games. All test types are limited to 45 minutes on physical devices and 60 minutes on virtual devices, and any uncaught exception fails the test. Results appear in the Firebase console with per-test-case videos and screenshots, pass, fail and flaky counts, and raw logs stored in a cloud bucket. A Robo test can also be recorded in Android Studio and reused — the same mechanism behind the custom scripts you can attach to a pre-launch report.
Availability and cost need care. Test Lab offers a free tier and is a paid service above it: on the no-cost Spark plan, Google documents 10 test runs per day on virtual devices and 5 per day on physical devices, while on the Blaze plan a daily allowance of 30 minutes of physical-device test time and 60 minutes of virtual-device test time is included before usage is charged per minute. Google also notes that you can test at no cost through the pre-launch report path when you publish to the alpha or beta channel. Because quotas and the available device list change, check the current pricing and device pages before planning around them.
What Test Lab cannot do is judge your app. A Robo crawl explores screens; it does not know that your onboarding copy is confusing, that a gesture feels wrong on a 6.1-inch screen, or that a flow collapses when a user walks into a lift mid-upload. Those remain reasons to keep real hardware in the plan — ideally the configuration your own users are most likely to be holding. Android's own running on a device guidance is unusually blunt about this: "Always test your Android app on a real device before releasing it to users." That sits alongside the emulator tooling rather than contradicting it — emulators for breadth, real hardware for the final answer.
Figure 2 — Emulators give breadth, a real device gives truth, and a cloud device lab gives reach. Most teams need all three.
A ten-step compatibility testing workflow
This order keeps effort proportional to risk. Each step produces something the next step needs.
- Define what you support. Write down the minimum Android version, the form factors, the locales and the hardware features your app declares. The minimum version you support is a separate setting from the API level you target and publish against, and the target level decides which platform behaviour changes your app inherits. Everything downstream is measured against this list, and it is also what determines which devices the store considers compatible.
- Name the journeys that matter. Usually four to eight: first install and launch, sign-up, the primary task, a purchase or submission, and a recovery path such as password reset. Everything else is secondary.
- Choose representative configurations. Use the matrix above to pick a small set that covers your oldest supported version, your smallest and largest windows, one heavily customised manufacturer build and one modest device. Add hardware and locale rows only where your app depends on them.
- Test installation, launch, onboarding and permissions. Install from a fresh state rather than upgrading the build already on your phone, then test an upgrade over an older version as well — updating users keep data and settings that a fresh install never has. Confirm first-run screens fit, then walk every permission state: allow, deny, deny permanently, and revoke later from system settings.
- Check layouts at each window size and orientation. Look for clipped text, controls under system bars or display cutouts, overlapping elements, unreadable contrast and stretched components. Rotate mid-task and confirm the screen does not reset. Android's guidance is to test the compact, medium and expanded widths deliberately, and to confirm that state is restored across configuration changes rather than assumed.
- Exercise the major features on real hardware. Anything touching camera, location, Bluetooth or sensors needs a physical device. Confirm the app degrades gracefully when a feature is missing, rather than crashing or silently hiding the flow.
- Look for crashes, ANRs, performance and network behaviour. Watch startup time, scrolling and memory on the weakest device in your set. Then reproduce real network conditions: slow, interrupted mid-request, and switched between Wi-Fi and mobile data.
- Review automated results and the pre-launch report. Treat each error, warning and minor issue as a question — which device, which state, what did the crawler do next — rather than as a score.
- Record, prioritise and fix. Every issue gets the minimum metadata that makes it reproducible: device, Android version, window size, steps, expected and actual result. Then rank by user impact, not by the order you found them.
- Retest and run a regression pass. Re-run the failed case on the device that exposed it, then re-run the core journeys on your smallest and oldest supported configurations, because fixes are where new layout and state bugs get introduced.
Compatibility testing checklist
Save this and work through it before each release, not once per project.
Install and first run
- ☐ Clean install from a fresh state on every configuration in the matrix
- ☐ App launches without a crash or a long blank screen on the oldest supported version
- ☐ First-run screens, dialogs and onboarding fit the smallest supported window
- ☐ An upgrade over the previous version installs cleanly and keeps the user's data
Accounts and permissions
- ☐ Registration and sign-in complete, including any third-party or Google sign-in path
- ☐ Password reset or account recovery works from a cold start
- ☐ Allow, deny, deny permanently and revoke later permission states all handled with a clear message
Layout and navigation
- ☐ Core journeys completed on compact, large and tablet or resizable windows
- ☐ No clipping, overlap, unreadable text or controls hidden behind system bars
- ☐ Landscape and multi-window checked, with no crash or lost state on change
- ☐ Long-string and right-to-left locales checked if you ship them
Behaviour under pressure
- ☐ Notifications and background work behave on a battery-restrictive manufacturer build
- ☐ Slow network, dropped request and a Wi-Fi to mobile-data switch produce clear states and no duplicated actions
- ☐ Startup time, scrolling and memory are acceptable on the weakest device tested
- ☐ Offline or degraded mode exits cleanly rather than freezing
Accessibility, tooling and follow-up
- ☐ Screen-reader labels, touch-target sizes and colour contrast checked on at least one device
- ☐ Pre-launch report reviewed, including OS compatibility findings and any devices listed as incompatible
- ☐ Automated layout and rotation tests updated for everything you fixed
- ☐ Every fix retested on the device that exposed it, plus a regression pass on the smallest and oldest configurations
Common mistakes to avoid
- Testing only on your own device. It is the least representative device you have: newer, cleaner, better resourced, and configured exactly how your app expects.
- Choosing devices without your audience in mind. Testing a flagship none of your users own is not coverage; it is comfort. Start from what your install base and target market actually hold.
- Ignoring screen size and orientation. These are the cheapest bugs to find and the most visible to users. Rotation and resizing are also where state-restoration crashes appear.
- Relying only on emulators. Emulators are excellent for breadth and iteration, but they are not real chipsets, cameras, Bluetooth stacks or manufacturer builds — and their performance profile is not a phone's.
- Relying only on automated reports. A crawler cannot sign in without credentials, cannot judge whether a flow makes sense, and cannot exercise a feature that needs the outdoors. Automation finds crashes and regressions; it does not assess the experience.
- Dismissing warnings without assessing impact. A slow-startup warning on your weakest supported device is a user-facing bug waiting to happen. Read the device detail behind each warning before deciding it does not matter.
- Recording issues without reproducible steps. "Broken on Samsung" is not a bug report. Without device, version, window size and steps, the next person starts from zero.
- Fixing without retesting. A layout fix is a change like any other, and fixes are a common source of new regressions on the configuration you just touched.
- Treating compatibility testing as a guarantee of store approval. They are different processes. Passing your own compatibility pass — or even a clean pre-launch report — says nothing about Google's review decisions, and no testing method guarantees that every issue has been found.
Recording and prioritising bugs
A compatibility bug is only useful if someone else can reproduce it. Capture the minimum reproducible set every time: the device model, the Android version, the window size or orientation, what you did, what you expected, and what happened.
| Issue | Device & Android version | Steps to reproduce | Expected result | Actual result | Severity | Status |
|---|---|---|---|---|---|---|
| Date picker overlaps the confirm button | Compact phone, 5.4 in, Android 11 | Open booking > tap date field > select any date | Dialog fully visible | Confirm button clipped off-screen | Medium | Open |
| Sign-in fails behind a VPN | Mid-range phone, Android 14 | Connect VPN > open app > sign in | Signs in, or shows a retry message | Spinner, then crash | High | Fixed · retested |
| Progress lost on rotation | Tablet, Android 13, landscape | Fill half the form > rotate the device | Entered values preserved | Form resets to empty | Medium | Open |
Severity and priority are different measurements, and conflating them is how low-impact bugs get fixed before serious ones. Severity describes how bad the failure is for the user. Priority describes how urgently you should fix it, given how many users hit it, whether a workaround exists, and what else is in flight.
A worked example of each:
- High severity, low priority. The app crashes when a photo is taken using a specific camera mode on one rare older device. When it happens it is a total failure — but almost nobody using your app can trigger it, and no data is lost.
- Low severity, high priority. A label is truncated on the smallest supported screen in the main navigation. Nothing crashes and no data is at risk, but every user of that device sees it on every launch, and it undermines trust in a screen they visit constantly.
Rank compatibility bugs by who is affected and how badly, then fix in that order. A crash on a device that 15% of your users own outranks a cosmetic flaw on a flagship nobody in your install base has.
Frequently asked questions
How do I test an Android app on different devices?
Start with a written matrix based on your supported Android versions and window sizes, then combine three layers: automated UI and screenshot tests in CI for layout and rotation regressions, the Play Console pre-launch report or Firebase Test Lab for breadth across real devices, and manual runs on the physical devices you can get hold of — especially the oldest and smallest configurations you support.
Can I test Android apps without owning many phones?
Yes. Emulators cover many API levels and screen sizes for free, Firebase Test Lab runs your tests on real devices you do not own, and the Play Console pre-launch report tests your uploaded bundle on Google's test-lab devices automatically. What you cannot fully outsource is judgement: keep at least one modest physical device in your process for the journeys where feel and clarity matter.
Is an emulator enough for Android compatibility testing?
No. Emulators are the best tool for cheap, repeatable coverage of screen sizes, densities and API levels, and Google's own tooling lets you run tests at configured sizes without a device. But an emulator is not a real chipset, camera, Bluetooth stack or manufacturer build, and its performance profile differs from a phone. Use emulators for breadth and real devices for truth.
What is the difference between compatibility testing and functional testing?
Functional testing asks whether a feature behaves as specified on a known-good setup. Compatibility testing asks whether the same feature still behaves correctly across different Android versions, devices, window sizes, manufacturer builds, locales and network conditions. They overlap — a bug found on a small screen is both a layout defect and a functional failure — but they answer different questions.
Can Google Play Console automatically test my app?
Partly. Play Console generates a pre-launch report automatically when you upload an app bundle or APK, subject to device-lab capacity. It installs the app on a set of test devices and crawls it for several minutes, then reports stability, Android compatibility, performance and accessibility findings. You can improve the results by supplying test-account credentials, a Robo script, a game loop, deep links or language preferences. Google states it cannot guarantee that every issue will be identified.
How many Android devices should I test before release?
There is no official minimum, and no universal number that suits every app. The useful answer is coverage rather than count: at least your oldest supported Android version, your smallest and largest supported windows, one heavily customised manufacturer build, and one modest device. Add rows for any hardware feature or locale your app depends on. A short matrix you actually run beats a long list you never complete.
Does compatibility testing guarantee Google Play approval?
No. Compatibility testing reduces the chance that users meet broken behaviour; it is not a review process, and it does not guarantee a bug-free app. A clean pre-launch report in particular only means no issues were found on the tested devices under the tested conditions. Google Play review decisions are separate, and no testing method guarantees the outcome.
Where this fits in a Play closed test
If you are on a personal developer account created after November 13, 2023, you will meet a separate requirement before you can publish: a closed test with at least 12 testers opted in continuously for the previous 14 days. That gate is about who tested and for how long. It is not a compatibility procedure, and compatibility testing cannot substitute for it — the two are often confused, so it is worth keeping them apart.
They do overlap in one practical way. Testers running your build on their own devices are the cheapest real-device coverage you will ever have, provided their feedback is specific enough to act on. That means asking for the device model, the Android version and the steps that led to the problem — not just "it crashed". A closed test with unstructured feedback produces a fortnight of noise; a closed test with a light reporting habit produces a free compatibility bug list.
Two things make that easier. First, set feedback expectations before the test starts rather than chasing people on day 12 — what to record during a 14-day test covers a workable format. Second, keep at least part of the test on real hardware, because emulators do not satisfy Play's tester requirements, which is one more reason real devices belong in the plan. If you are setting the track up, adding testers to a closed test walks through the mechanics, and what resets a testing period covers the mistakes that cost you the fortnight.
If you would rather not run the testing period yourself
12 Testers Community organises Google Play closed testing on real Android devices: 12+, 15+ or 20+ verified testers across the full 14 days, a live progress dashboard, and a written report at the end with issues ranked by severity and priority. Plans start at $14.99 as a one-time payment, with a money-back guarantee and a free retest if Google does not approve.
We are not affiliated with Google and cannot guarantee production access — that decision is Google's alone. What a real-device test does give you is coverage on hardware you may not own, and feedback in a form you can act on. See how it works →
The wider point stands on its own. Compatibility testing is not a phase you finish; it is the habit of asking "on which device, at which window size, on which Android version, and under which conditions?" before you ship. Answer that question deliberately, keep the answers written down, and the app that works on your phone has a much better chance of working on everyone else's.
Official resources
- Test different screen and window sizes — what to verify for visual attributes and state restoration, and which test type fits which case.
- Run apps on a hardware device — Google's guidance on testing on real hardware before release.
- Libraries and tools to test different screen sizes — DeviceConfigurationOverride, Robolectric, Gradle-managed devices, Firebase Test Lab and test filtering.
- UI testing — behaviour and screenshot tests, and the API level, locale and orientation axes of compatibility testing.
- Window size classes — the compact, medium, expanded, large and extra-large breakpoints, and why they describe the window rather than the device.
- Use a pre-launch report to identify issues — how the report is generated, what it tests, and how to customise it.
- Understand your pre-launch report — errors, warnings and minor issues; stability, performance, accessibility and screenshot findings.
- Firebase Test Lab — getting started with Android testing — test matrices, the available test types, and how results are stored.
- Firebase Test Lab overview — key capabilities, and how the service runs tests on devices in a Google data centre.
- Firebase Test Lab quotas and pricing — the free test-run allowances and per-minute charges above them.
About this guide. 12 Testers Community organises Google Play closed testing for Android developers. The technical explanations above are drawn from the official Android Developers, Google Play Console Help and Firebase documentation listed here, checked in October 2026. Where a detail depends on current tooling, quotas or device availability, follow the linked page rather than this summary.
Wider reading: the complete 14-day closed testing guide for 12 testers, common closed-testing problems and fixes, and how to answer the production access questionnaire.